Preventing Mold and Mildew: Best Practices for Shower Tile Maintenance
Posted by Xavier Lentoose in Business on Mar 8th, 2025 | Comments Off on Preventing Mold and Mildew: Best Practices for Shower Tile MaintenanceMold and mildew can quickly take hold in a bathroom, especially on shower tiles where moisture lingers. Left unchecked, these fungal growths not only create an unpleasant appearance but can also pose health risks and contribute to structural damage. Fortunately, with the right maintenance routine, it is possible to keep your shower tiles clean and mold-free. Understanding what causes mold growth and adopting preventive measures will help maintain a fresh and hygienic bathroom environment. Check Over Here – Discover the best shower tile maintenance tips to keep your bathroom looking fresh.
Understanding the Causes of Mold and Mildew
Mold and mildew thrive in warm, humid environments with limited ventilation. The shower area, which is frequently exposed to water, provides an ideal setting for their growth. Soap scum, shampoo residue, and body oils can also contribute by creating a layer that traps moisture on tile surfaces. If grout lines and caulking are not properly sealed, they can absorb water, further encouraging the spread of mold. Without regular cleaning and adequate airflow, mold spores will continue to multiply, making them harder to eliminate.
Keeping Shower Tiles Dry
One of the most effective ways to prevent mold growth is to keep shower tiles as dry as possible. After each shower, using a squeegee or a microfiber towel to wipe down tiles can remove excess water and reduce moisture buildup. Leaving the bathroom door or a window open after showering allows humidity to escape, helping surfaces dry faster. Running an exhaust fan during and after a shower can also improve airflow and prevent condensation from settling on tiles.
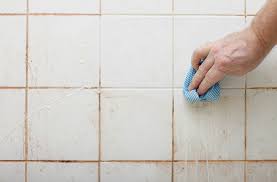
Cleaning Shower Tiles Regularly
Routine cleaning is essential to stop mold before it starts. Using a mild cleaning solution or a vinegar-water mixture helps break down soap scum and residue that can contribute to mold growth. A soft-bristled brush or sponge can be used to scrub grout lines where mold often develops. Harsh chemical cleaners should be used sparingly, as they can weaken grout and damage tile finishes over time. For stubborn stains, a paste made of baking soda and water can be applied to grout, left for a few minutes, and then scrubbed away.
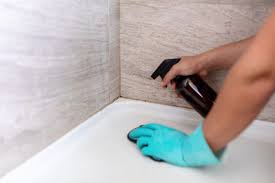
Sealing Grout and Caulking
Grout and caulking are particularly vulnerable to moisture absorption. If grout is left unsealed, it can become a breeding ground for mold. Applying a high-quality grout sealer every few months creates a protective barrier that prevents water from seeping in. Similarly, caulking around the edges of the shower should be checked for signs of wear. Cracked or peeling caulk should be removed and replaced to ensure a watertight seal.
Choosing Mold-Resistant Materials
When renovating a bathroom or replacing tiles, choosing mold-resistant materials can make maintenance easier. Porcelain and glazed ceramic tiles are less porous than natural stone, making them more resistant to mold. Epoxy grout, which is non-porous and waterproof, is a durable alternative to traditional cement-based grout. Using mold-resistant caulk and waterproof paint on bathroom walls can further reduce the likelihood of mold developing.
Managing Humidity Levels
Keeping overall humidity levels in check is key to preventing mold and mildew. If a bathroom tends to stay humid even with proper ventilation, using a dehumidifier can help regulate moisture levels. Checking for leaks in plumbing fixtures and ensuring proper drainage in the shower area can also prevent excess water from accumulating. Using mildew-resistant shower curtains and regularly washing bath mats can help reduce mold growth in surrounding areas.
Addressing Mold Growth Promptly
Even with the best prevention methods, mold may still appear in small amounts. Addressing it as soon as it is spotted can prevent it from spreading. Scrubbing the affected area with a mixture of water and hydrogen peroxide or a mild bleach solution can eliminate mold spores. If mold has penetrated deep into grout or behind tiles, professional cleaning or regrouting may be necessary to prevent further damage.